¶ Setup PVYanalytics with PVYbusiness OS for PVYcms
PVYbusiness OS delivers a top-notch secure SSR driven headless CMS for your Website, out of the Box integrated with PVYbusiness OS which act as seperate Application, (isolated) as your Content Management System or eCommerce Management System.
PVYanalytics is integrated for all Buttons, Call to Actions and Content Blocks, and can even track the user behaviour on a Multi-Step-Wizard or Product Configurator. Its using the PVYanalytics SDK over Websockets.
¶ Getting started
Withing PVYanalytics, create a new Project in your Workspace. Copy your API and Project-ID into Text Editor or directly in PVYbusiness OS, Menu Website, Submenu “Globals”, in the Section for PVYanalytics. Also activate the Checkbox there.
With this step you have already full site coverage on Analytics including Buttons for Forms, Downloads.
¶ Make a plan
PVYanalytics is ease of use in the UI, but let you go into depth. With Events and Funnels, you can create a Goal for Conversion, or Target, a Visitor or User of your Web App shall go trough until you can win this visitor as a lead or customer.
This requires, you have a plan, what sections of a form, or interaction the Vistor shall perform. Or what you like to measure and analyse.
Before you can create Funnel in PVYanalytics, you need to create the corresponding Events, which can be a button, or a few of them, forms, wizards, or any content block interaction. They all have a field called “Tracking ID”, where you can paste and save the auto-generated Event Tracking ID from PVYanalytics for this particular element on your Website / Web App.
¶ Overview
PVYanalytics provides two interfaces for data interaction:
- WebSocket SDK (
@pvyswiss/analytics-sdk) — client-side tracking via WebSocket - tRPC API (
analytics.pvy.swiss/api/trpc/) — dashboard backend (session-auth only)
¶ WebSocket SDK API
We integrated the SDK of PVYanalytics fully into our headless PVYcms, so you benefit fron a non-blockable, non-invasive Website Tracking, which is fully GDPR compliant, and does not require a Cookie Banner with Consent.
¶ Initialization
import { initPVYanalytics } from "@pvyswiss/analytics-sdk";

initPVYanalytics({
  projectId: "cmsycf7swProjectIDnumber",
  apiKey: "pvy_live_your_api_key",
  // Optional: defaults to wss://ws.analytics.pvy.swiss in production (v2.0.2+)
  // wsHost: "wss://ws.analytics.pvy.swiss",
  // Optional: enable debug logging
  // debug: true,
});
This Initialitation you do not need to perform manually. Soon you have filled the Project-ID and API Key for it ony our PVYcentral, the System will re-deploy your Website if hosted on PVY.swiss and perform the Initialization automatically (See Guidelines on PVYanalytics).
¶ IP Restriction
Within PVYanalytics Dashboard, Project Settings, you have Analytics IP Restriction for your Website. You fill there the IP of your PVYcms you got. We also built-in Rate Limits and Bot Protection, however, limiting the Websocket Feature on PVYanalytics to your Project IP only sets the limit clearly and reject automatically any Bearer Authentication attempts from unauthorized third-parties.
The fields are:
Restrict Analytics to IP:
Exclude Tracking from IP:
The later will exclude your company or Web-Admin IP to be counted on PVYanalytics. Up to 10 IPs you can add, to prevent while observing or testing your own Production ready Website, false Metrics.
¶ Auto-Tracking: data-pvyanalytics-event Attribute
The SDK automatically tracks elements with the data-pvyanalytics-event attribute. All interaction types (click, impression, hover) are tracked automatically — no JavaScript calls needed.
<!-- Data attribute (recommended) -->
<button data-pvyanalytics-event="pvyai-contact-sales">Contact Sales</button>

<!-- ID attribute (alternative) -->
<button id="pvyanalytics-event-pvyai-contact-sales">Contact Sales</button>
¶ SDK Configuration (PVYcms Integration)
Environment variables (baked into client bundle at build time), which you can fill in PVYcentral in the App Menu, select PVYbusiness OS, Variables. (It shows you all Third Party Integration such as Stripe, PVYanalytics, PVYmessenger and so one.
| Variable | Example | Description |
|---|---|---|
VITE_PVY_ANALYTICS_PROJECT_ID |
cmsycfMyProjejctID |
Project ID from PVYanalytics dashboard |
VITE_PVY_ANALYTICS_API_KEY |
pvy_live_... |
API token (public, client-side) |
VITE_PVY_ANALYTICS_WS_HOST |
wss://ws.analytics.pvy.swiss |
WebSocket host (optional, overrides default) |
¶ PVYbusiness OS Integration (PVYcms)
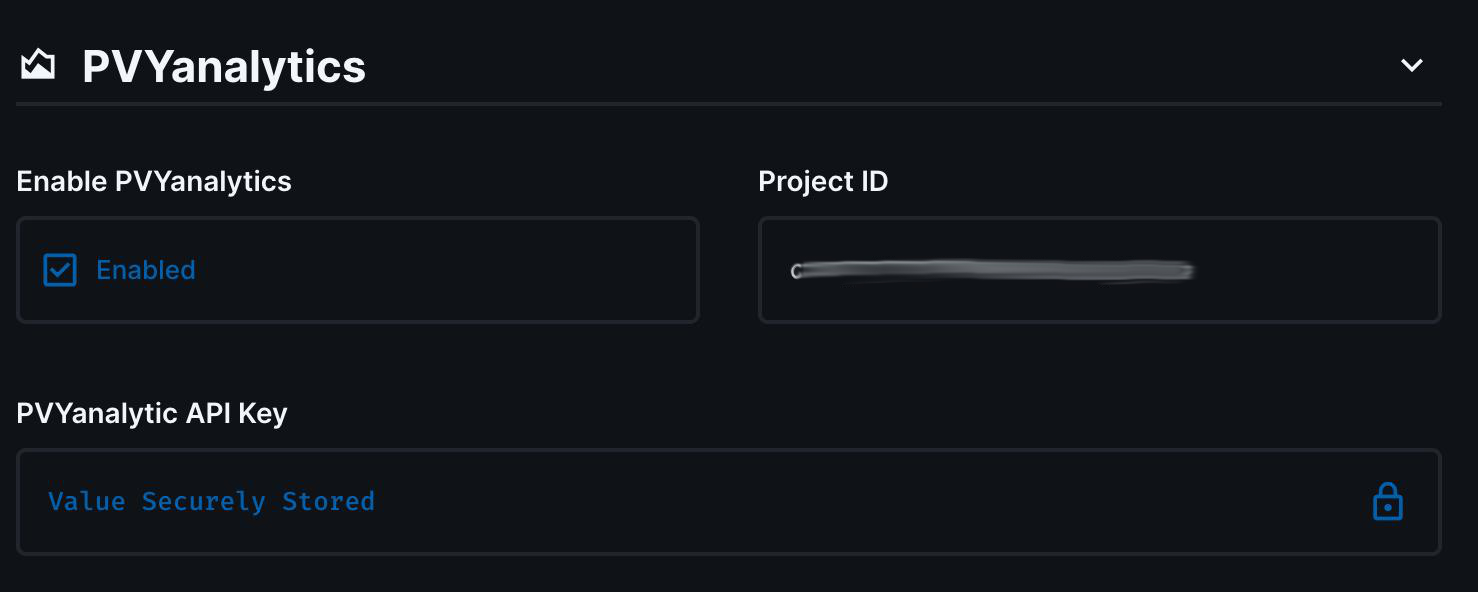
Navigate in the left Menu to “Website” click on “Globals” and scroll down to the Analytic Section.
Enter your API and Project-ID, activate it and save. That’s it.
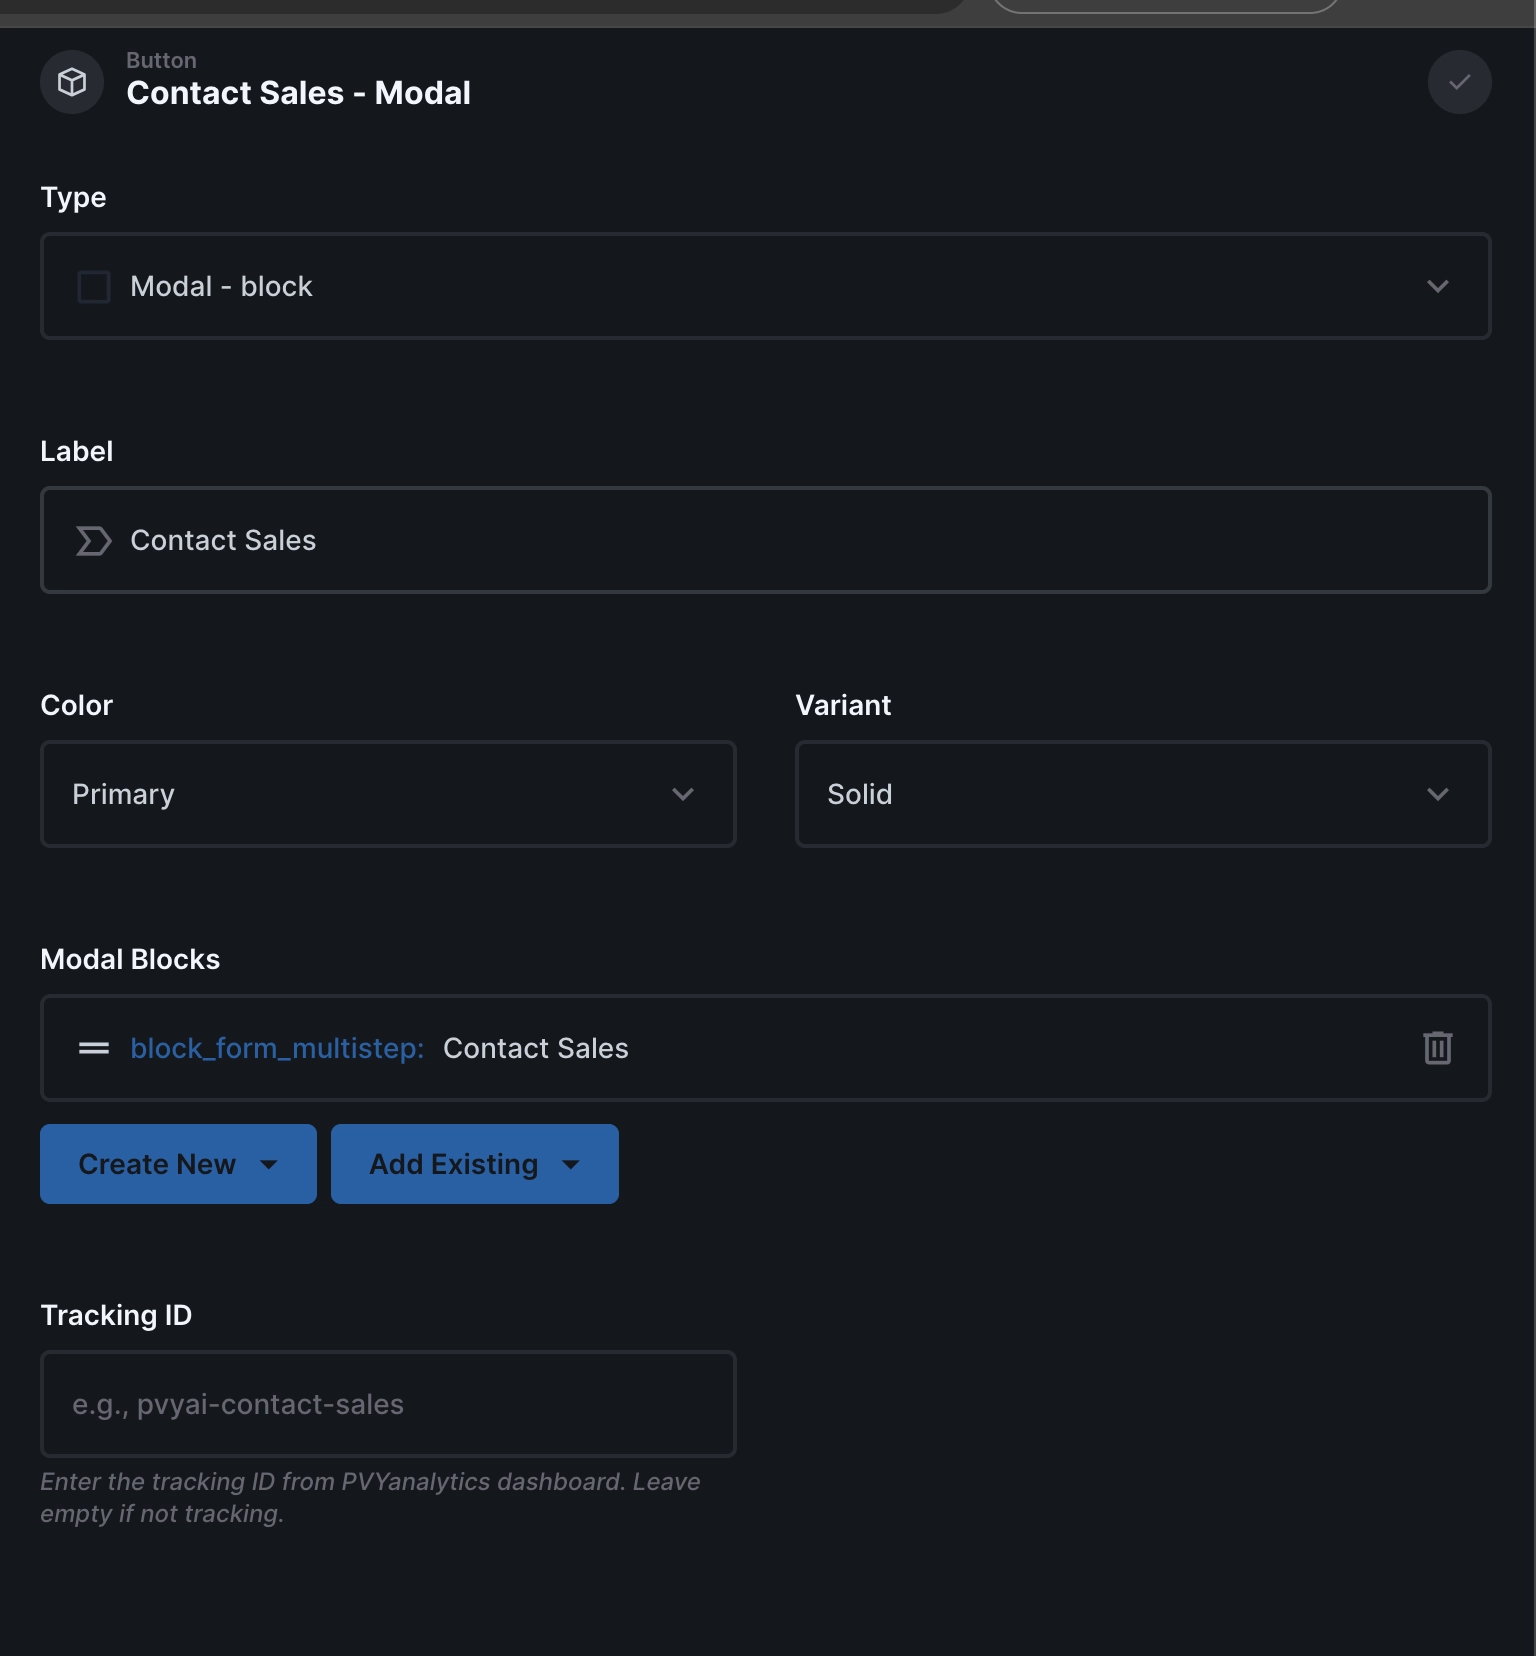
¶ PVYbusiness OS Collections with tracking_id Field
The following collections have a tracking_id field for PVYanalytics event tracking:
| Collection | Scope | Example Tracking ID |
|---|---|---|
block_button |
Individual buttons in button groups | pvyai-contact-sales |
block_cta |
CTA section blocks | pvyai-cta-main |
block_hero |
Hero section blocks | pvyai-hero-cta |
block_webinars |
Webinar listing blocks | pvyai-webinars-cta |
block_job_listings |
Job listing blocks | pvyai-careers-cta |
block_columns_rows |
Column row blocks | pvyai-column-row-1 |
block_step_items |
Step items in steps blocks | pvyai-step-1 |
block_hero_slider_item |
Hero slider items | pvyai-slider-item-1 |
¶ PVYbusiness OS Globals
| Field | Value | Description |
|---|---|---|
Enable_PVYanalytics |
true |
Global toggle for analytics |
Project_ID |
cmsycf7sw0001nf07ah0g4beh |
PVYanalytics project ID |
PVYanalytic_API_Key |
(argon2id hashed) | API key (stored hashed for security) |
¶ Frontend Rendering
The PVYcms frontend renders data-pvyanalytics-event attributes on:
- Button group buttons — renders the attribute on
<a>and<button>elements whentracking_idis set - Modal buttons —
ButtonModal.tsxrenders the attribute on the trigger button - Cal embed buttons —
CalEmbedModal.tsxrenders the attribute on the scheduling button - Wizard step containers — renders
data-pvyanalytics-event="{formGroupKey}-step-{stepNumber}"on each step container for impression tracking
¶ Wizard Funnel Tracking
Multi-step wizards automatically generate tracking IDs for funnel analysis:
| Wizard | Step 1 | Step 2 | Step 3 | Submit |
|---|---|---|---|---|
| Contact Sales | contact-sales-wizard-step-1 |
contact-sales-wizard-step-2 |
contact-sales-wizard-step-3 |
wizard_submit (trackEvent) |
| Contact Sales AI | contact-sales-ai-wizard-step-1 |
contact-sales-ai-wizard-step-2 |
contact-sales-ai-wizard-step-3 |
wizard_submit (trackEvent) |
| Cloud Order | cloud-order-wizard-step-1 |
cloud-order-wizard-step-2 |
cloud-order-wizard-step-3 |
wizard_submit (trackEvent) |
| PVY@Office Order | on-prem-order-wizard-step-1 |
on-prem-order-wizard-step-2 |
on-prem-order-wizard-step-3 |
wizard_submit (trackEvent) |
| Partner Signup | partner-signup-wizard-step-1 |
partner-signup-wizard-step-2 |
partner-signup-wizard-step-3 |
wizard_submit (trackEvent) |
¶ Manual trackEvent Calls (Non-Button Events)
These events use trackEvent() JavaScript calls (not data attributes) because they’re triggered by async operations, not DOM clicks:
| Event ID | Type | Trigger | Metadata |
|---|---|---|---|
form_submit |
form |
PVYbusness OS Form success | form_id, form_title |
wizard_step |
wizard |
Step advance | form_group, step, total |
wizard_submit |
wizard |
Wizard completion | form_group, order_number |
login |
auth |
Password login success | method: "password" |
modal_open |
ui |
ButtonModal opens | label |
file_upload |
portal |
Upload complete | file_id |
file_download |
portal |
Download click | file_id, filename |
¶ Funnel Creation Guide
To create a funnel in PVYanalytics for the Contact Sales wizard:
- Go to PVYanalytics dashboard → Funnels → Create Funnel
- Add steps in order:
- Step 1:
contact-sales-wizard-step-1(impression) - Step 2:
contact-sales-wizard-step-2(impression) - Step 3:
contact-sales-wizard-step-3(impression) - Step 4:
wizard_submitwith filterform_group = contact-sales-wizard(conversion)
- Step 1:
- The funnel shows drop-off rates at each step
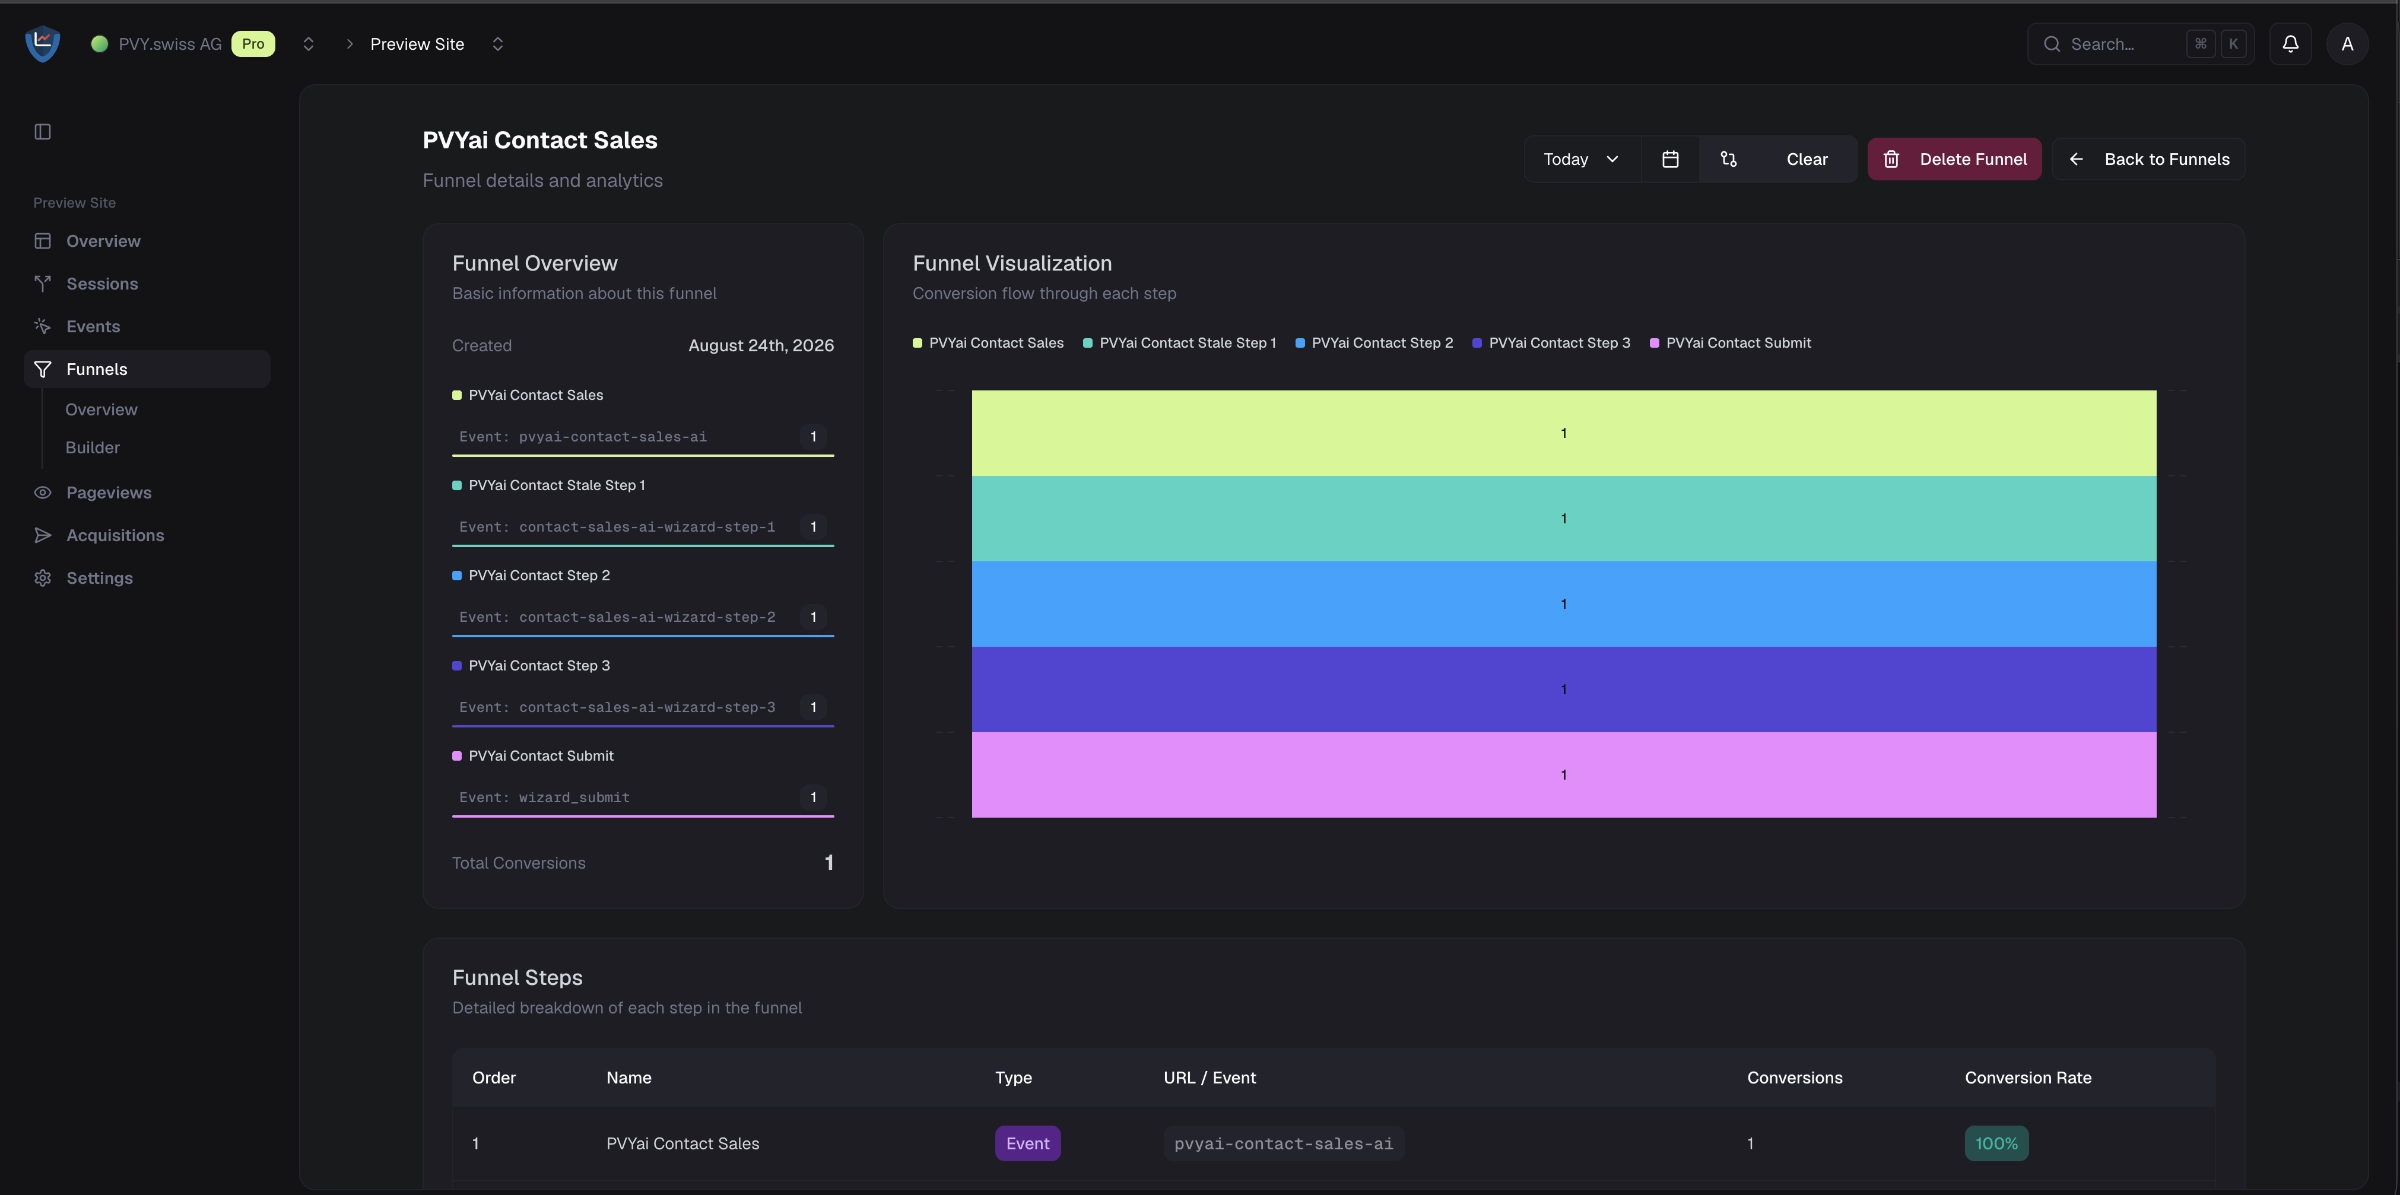
You can click into any Event Step, to see the Event Detail Analytics Overview, and from there, you see all Sessions from your Vistors / Users, where you can jump into the Session Details and see the Users “Journey”.
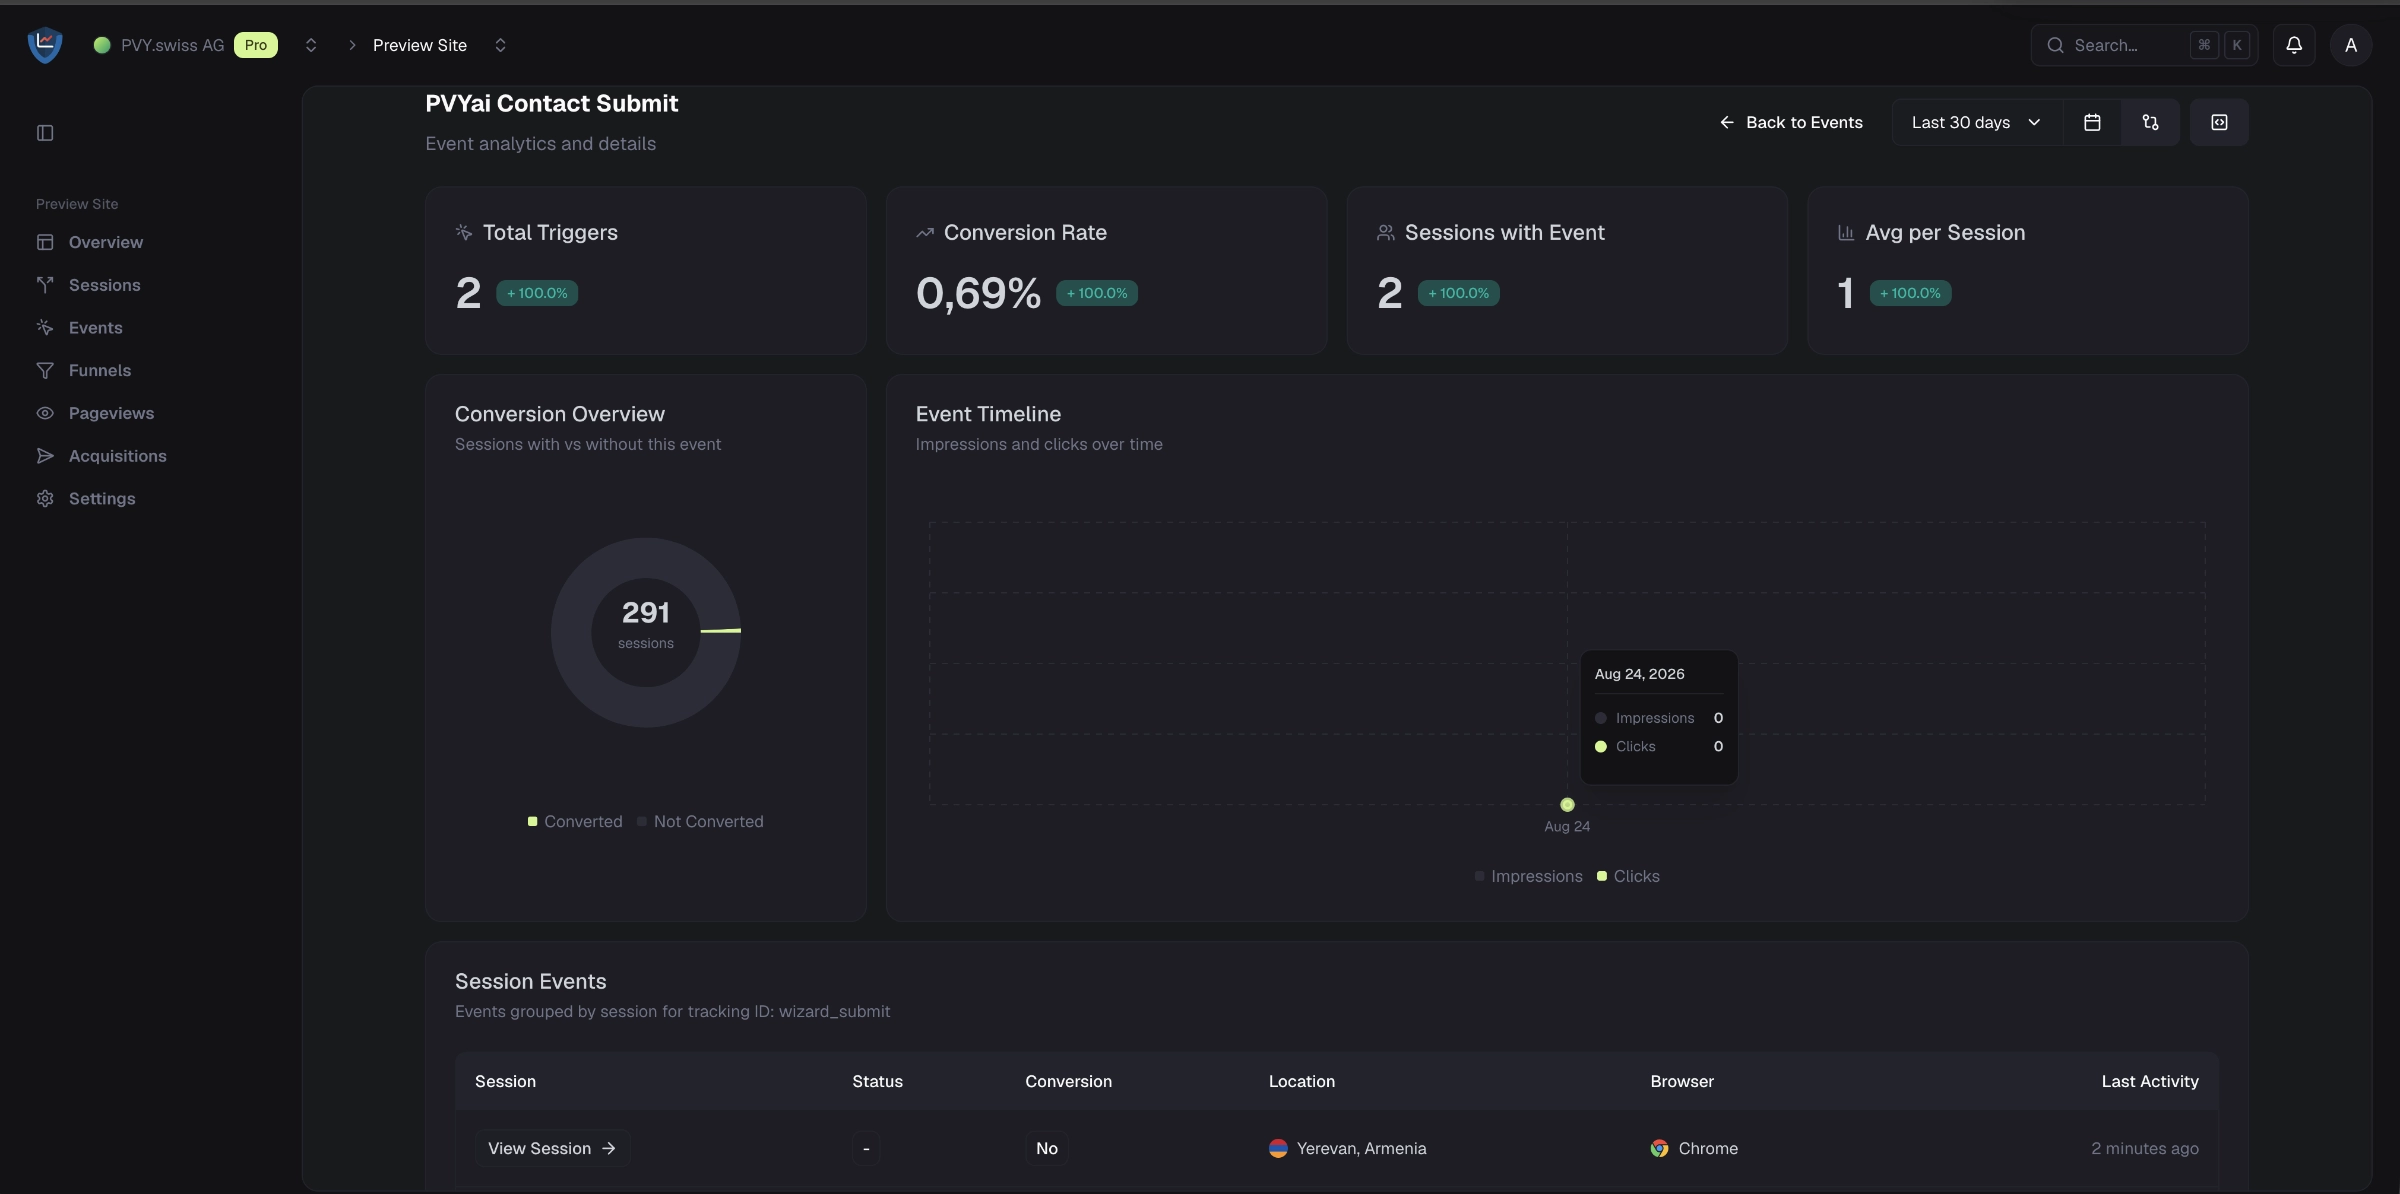
These metrics are useful for assessing the success of a social media or email campaign, or a referral/partner campaign. Combined with PVYlnkr you can also generate Hi-Res QR Codes for Print Campaigns or Screen Advertising, and track your Offline Campaigns perfectly too.
¶ How to track Visitors / Users Page scrolling?
If you have built longer pages with several Content Blocks, and you want to know, if they scroll to certain point, you have two Options:
Setup in PVYanalytics a specific Event for a specific content-block on this site, and copy the Tracking-ID into the Content Block on your PVYbusiness OS, or you can do the same for a Divider.